FABULOUS FLOWER POTS AND PLANTS
It's Spring and that means more sun. a little rain and warmer temperatures. Perfect weather for SEEDS to sprout. Here are a few ways you can watch these tiny seeds grow into amazing flowers or tasty little sprouts.

Material:
- Milk carton container - pint or quart size
- Potting soil
- Quick sprouting seeds
(like marigolds, pumpkin, grass,
mustard, parsley, lima beans, sweet peas
violas)
- Scissors
- Paint
- Glue
- Toothpick, popsicle stick or pencil
- Paper
- Any materials lying around your home like: old buttons, bottle caps, yarn, cotton balls, pipe cleaners, uncooked pasta: like elbows, bow ties, spaghetti; tin foil, straws and toothpicks are always neat items to add to any project (use your imagination)
- Spray bottle
Steps to follow:
- If using a pint milk carton, cut the top of the milk carton off so that you can see the inside. If you are using a quart milk carton, cut the carton in half.
- Cut a small hole in the bottom of the carton. This will allow the water to drain after you water your plant.
- Paint or decorate your milk carton "pot" and let dry overnight.
- Add soil almost to the top of the carton.
- Using a pencil point, insert 2-3 small holes it into the soil for the seeds to rest. Add 2-3 seeds and cover with dirt.
- Water seeds, place in the sunlight and watch it grow!!!!
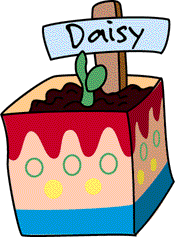
- Cut a small piece of paper and draw and/or write the kind of seeds you planted. Attach the paper to a toothpick, popsicle stick or pencil and then insert it into the soil. Now you have a name tag for your plant.
Remember although plants need lots of water, you don't want to over water your new plants.
 Variations:
Materials:
- Quick sprouting seeds (like above)
- Sponges
- Scissors
- Plate or shallow bowl
- Markers
- Spray Bottle
Steps to follow:
- Cut sponges into various spring shapes like flowers, sun, ducks and so on.
- Moisten sponge shape( it should be damp, not completely wet), place on a plate or in a shallow bowl and sprinkle with seeds.
- Cover the tray with cheesecloth- you'll need to spray this with some water to keep it moist. Place sponge in a sunny spot, but not directly in the sun.
- Take off the cheesecloth during the day and keep the sponge moist.
- Draw on seperate cards the different steps you took to plant your seeds. Now mix the cards and arrange them in the proper sequence of plant growth.
- Create a graph and chart the number of days it took for the seeds to sprout.
Back to the
Top.
Back to the Spring Craft Corner.