Things To Know Before You Begin
Host = The computer with Lightwave installed on it.
Nodes = Other computers on the network used for rendering.
Node computers do not need to have any NewTek software or hardware on them.
Host computer requires operating under Windows 95 or Windows NT.
Nodes may be operating under Windows 95 or Windows NT.
The key to understanding ScreamerNet is drive mapping and sharing. There are a variety of ways to configure a network and thus a variety of ways to set up ScreamerNet.
The assumption in this document is that you are running a network of Intel computers. We are also assuming that the Host computer's drive "C" is where the NewTek directory is found. Also every computer has one system drive labeled drive "C". If you plan to use ScreamerNet as your primary method of rendering, you will want to have a dedicated drive on the Host. This second drive would already have an ID other than C:, hence you would not need to do any drive mapping.
To set up your network, your Host computer's drive "C" will need to be shared and have another identity. To do this we will make use of a DOS command, Subst.exe, which will map your C: drive as Z:, and will automatically map your C: drive as Z: when the system boots. Feel free to map your drive as any letter you wish. We use drive letter "Z:" since it's the least commonly used drive letter.
HOST COMPUTER
Sharing Your Drive
1) You must share drive "C" with full access. Do this by right mouse clicking on the drive "C" itself, then left mouse click on "Properties".
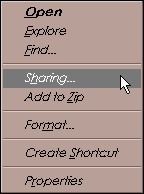
2) You will see three tabs at the top. Left mouse click on the "Sharing" tab.
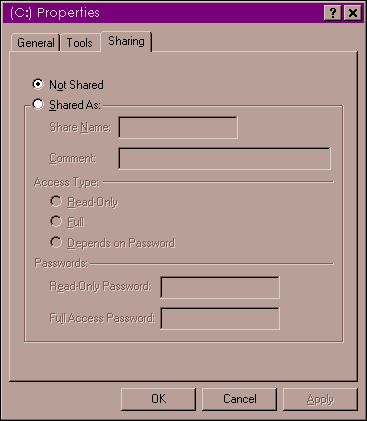
3) There are two buttons labeled "Not Shared" and "Shared As", left mouse click the "Shared As".
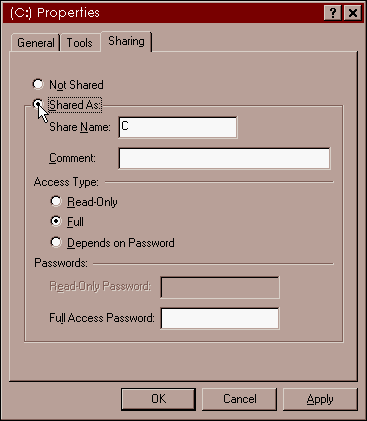
4) Under "Access Type" left mouse click the "Full" button.
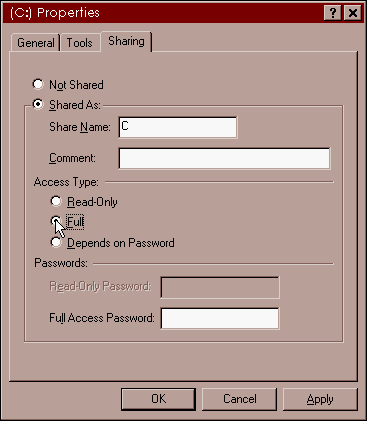
5) Click "OK" or "Apply".
6) Reboot. This will allow everyone on the network to read and write to your "C" drive.
Mapping The Host Drive
1) With all applications closed down, open a MSDOS Prompt
2) Type "cd C:\"
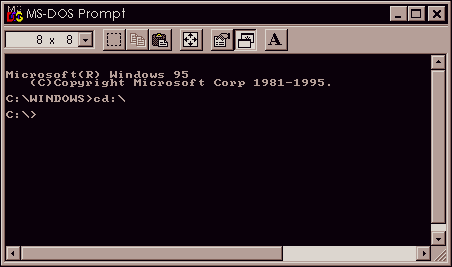
3) Enter the following in the Command line "C:\Subst.exe Z: C:"
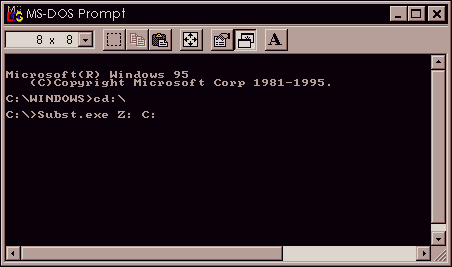
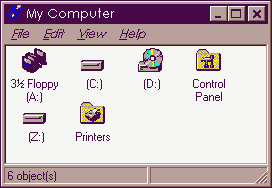
You should now see drive "Z" as a duplicate of drive "C".
To verify the change has taken place, double mouse click on "My Computer" in the Desktop and look for drive "Z".
Next thing to do is to adjust the LW.cfg so that the ContentDirectory points to the Z: drive.
To do this just open the LW.cfg from the Z: drive with WordPad, and use "replace" for C:\ to Z:\.
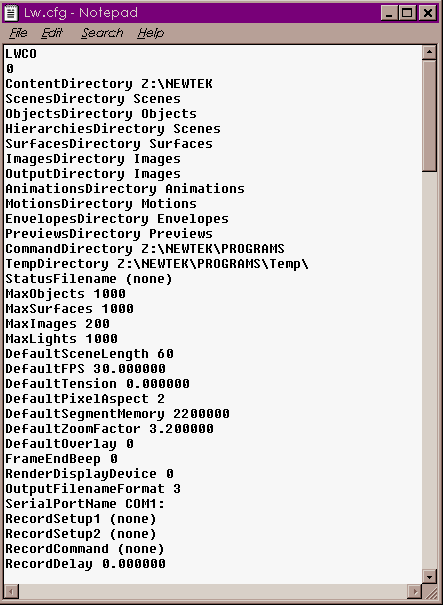
Save the file when finished.
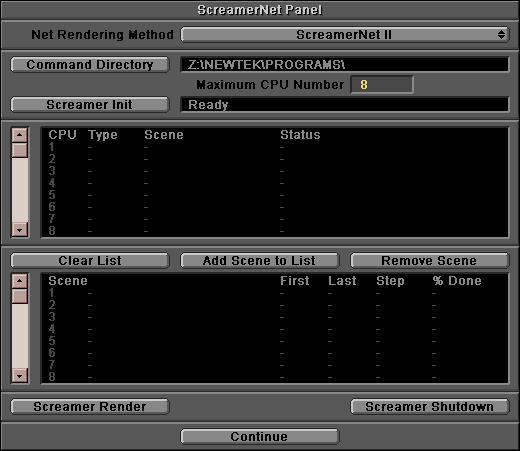
Start Lightwave, open the SN panel confirm that the Command Directory is set to Z:\NewTek\Programs.
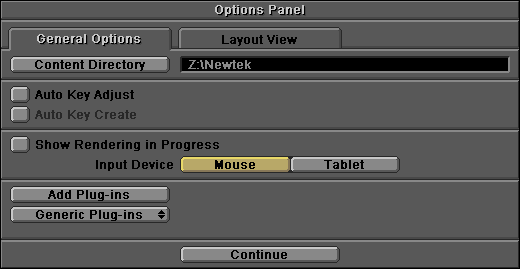
In the options panel, confirm that the content directory is set to Z:\Newtek. Quit Lightwave.
Starting ScreamerNet
1) With all applications closed down, open a MSDOS Prompt
2) Type "Z:\"
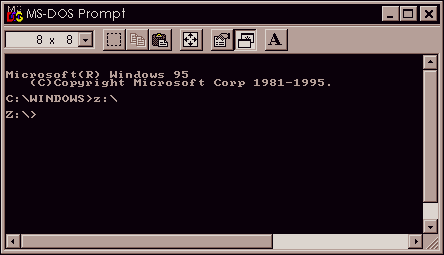
3) Enter the following Command Line
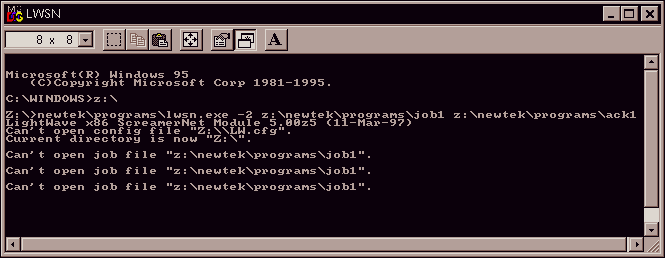
Z:\NEWTEK\PROGRAMS\LWSN.EXE -2 Z:\Newtek\Programs\Job1 Z:\Newtek\Programs\Ack1
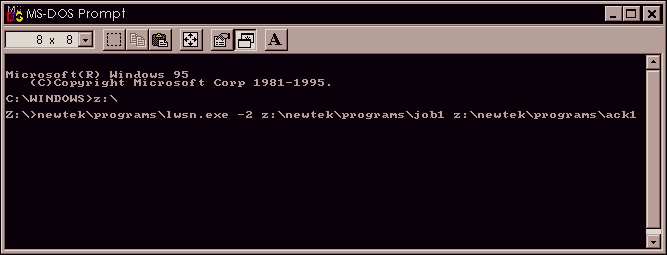
Wait a second or two, and you will see a message "Can't open Z:\NewTek\Programs\Job'X'". This will be normal until Lightwave initializes ScreamerNet.
NODE COMPUTERS
You must now make the drive "C" on your Host computer show up as drive "Z" on all of your Node computers.
1) Close down all open applications.
2) While on the Desktop, double click the left mouse button over "Network Neighborhood"(File Manager NT 3.5x). All computers found on the network will appear in the window.

3) Double click the left mouse button on the Host computer.
4) The names of the hard drives for that computer will appear in another window.
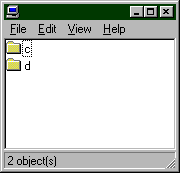
5) Right mouse click on the drive "C" then left mouse click on "Map Network Drive".
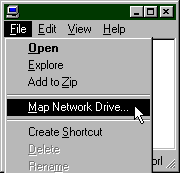
6) On the right side of the "Drive:" dialog box there is a down arrow.
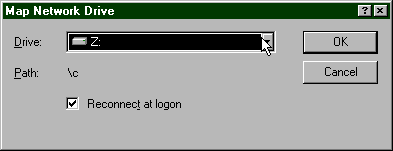
7) Left mouse click on the arrow and scroll down, then highlight "Z". This step does not have to be repeated if the "Reconnect at logon" button is checked.
8) Left mouse click on "OK"
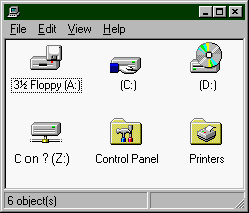
To verify the change has taken place, double mouse click on "My Computer" in the Desktop and look for drive "Z" in parentheses.
Starting ScreamerNet
1) With all applications closed down, open a MSDOS Prompt
2) Type "Z:\"
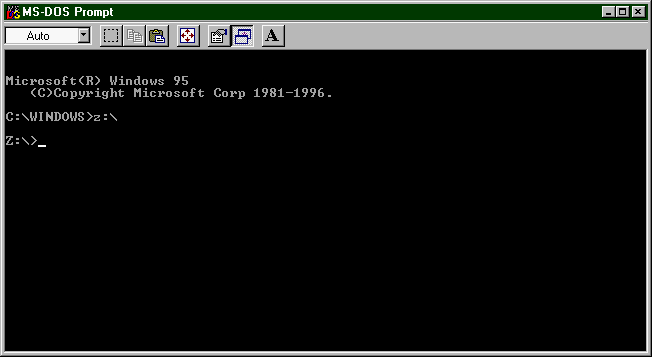
3) Enter the following Command Line
Z:\NEWTEK\PROGRAMS\LWSN.EXE -2 Z:\Newtek\Programs\Job2 Z:\Newtek\Programs\Ack2
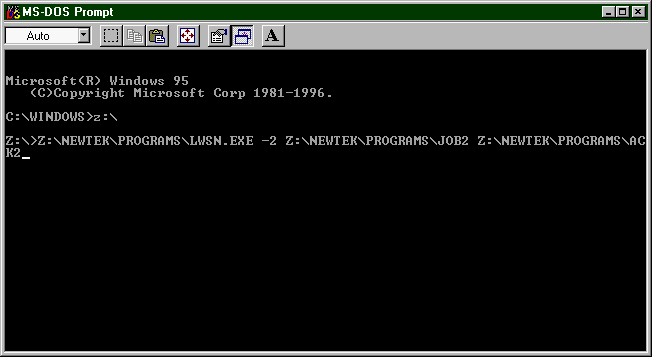
Wait a second or two, and you will see a message "Can't open Z:\NewTek\Programs\Job'X'".
This will be normal until Lightwave initializes ScreamerNet.
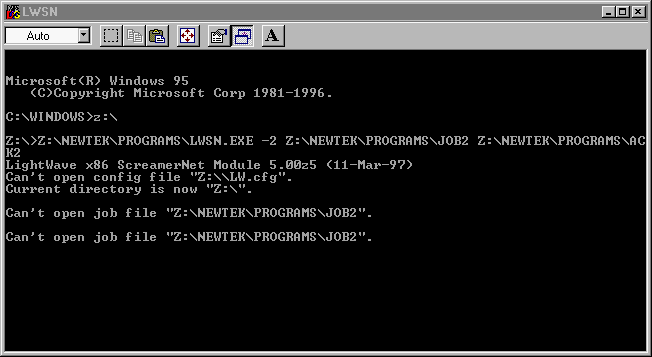
4) If you have more computer systems than just these two, repeat the above, but make the next system use Job 3 and Ack3, the next after that Job4 and Ack4, etc. But keep the rest of the command structure the same.
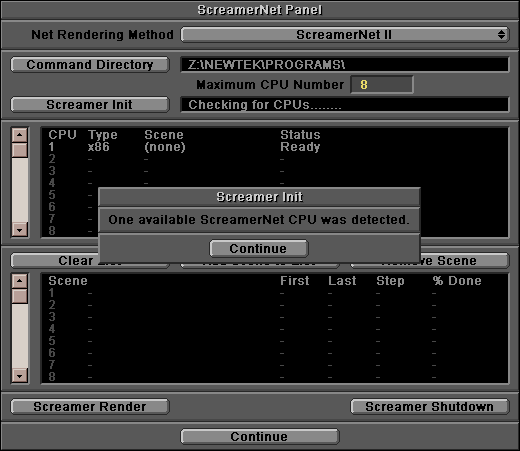
To initialize ScreamerNet, open Lightwave from the Host Z: drive and choose "Screamer Init" from the SN panel. During initialization the job number assigned to each node computer will correspond to the CPU number in the SN window. Be sure the number of CPU's is greater than or equal to the number of computers you are using. You are now ready to load a scene.
Scene Saving Info
Before saving the scene to be rendered, make sure that the ContentDirectory in the options panel points to "Z:\NewTek", anything else will not save the relative paths correctly for SN to find them. In order for these changes to work properly you must re-save all older scenes and objects with their paths set to the "Z:" drive. Otherwise, the scene to be rendered may not save any animation files or some objects and their images may be missing. Set up all of your saving options before saving the scene, including the record options that were saved with the scene. ScreamerNet does not render out animation's, only individual RGB files. After you save your scene some of the options do not show up when you reload the scene into Layout, this is normal.
Loading A Scene To Render
1) At this point, all of your CPU's that are running ScreamerNet should appear in the window.
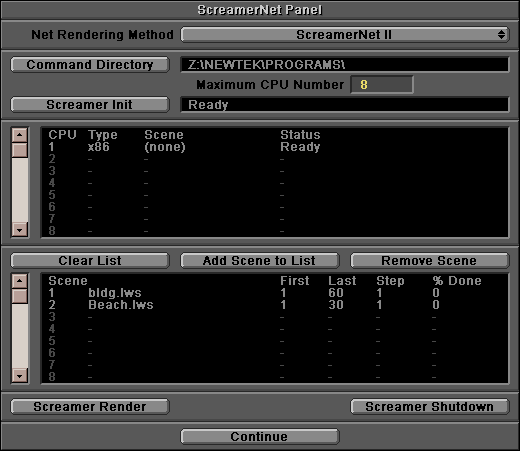
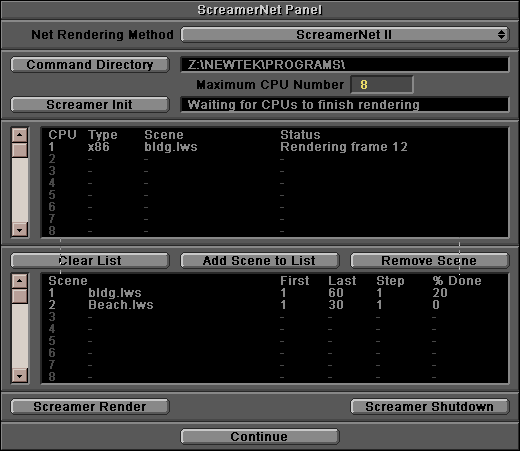
2) Click on "Add Scene To List" and select a Scene. Then click on "Screamer Render" button. This will now render your scene or list of scenes. If you want to use ScreamerNet to batch render several scenes on one computer, just Add Scene To List before Screamer Rendering. If you need to stop for any reason, push the escape key. You will need to wait for the CPU's to finish the frame they are working on.
CREATING SHORTCUT ICONS ON THE DESKTOPS
For icons you can use instead of opening a MSDOS prompt every time you would like to use ScreamerNet.
HOST COMPUTER
Mapping The Host Drive
1) Open Windows Explorer (File Manager NT 3.5x).
2) Go to the following directory; C:\Windows\StartMenu\Programs\StartUp
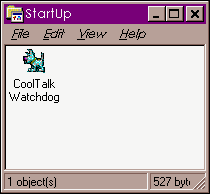
3) Place the mouse pointer over the right window and click the right mouse button.
4) Left mouse click on "New" then "Shortcut".
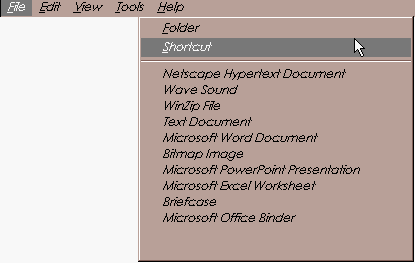
5) You will now see a new window that is titled "Create Shortcut".
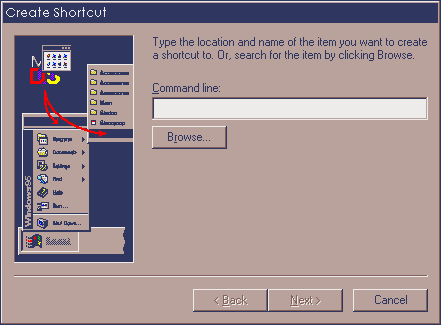
6) Enter the following in the Command line "Subst.exe Z: C:"
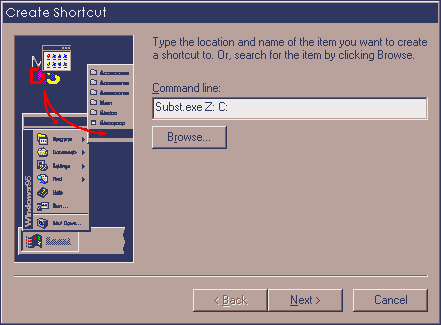
7) Left click the "Next>" button.
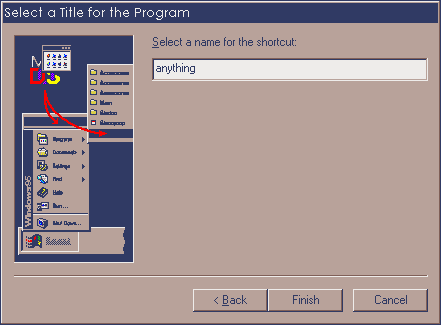
8) You must now select a name for the newly created shortcut use "MakeZ".
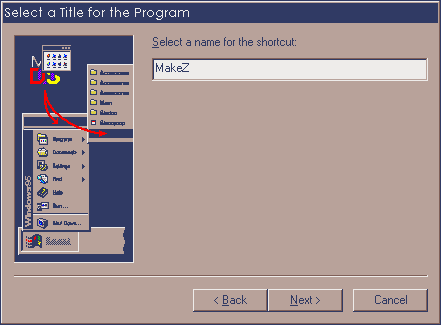
9) Left click the "Next>" button.
10) Now choose an icon. You may choose whichever you like.
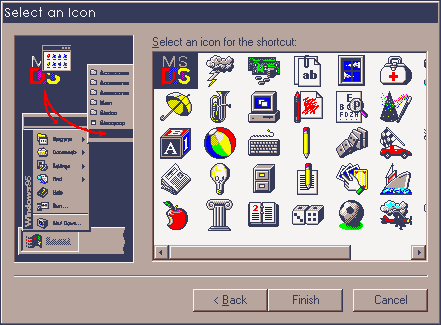
11) Click "Finish".
12) The new shortcut icon will now appear in the right hand window.
13) Right mouse click once on the newly created shortcut icon.
14) Left mouse click on "Properties".
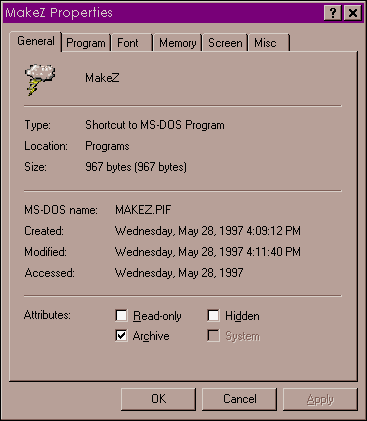
15) You will see two tabs. Left mouse click on the tab labeled "Program".
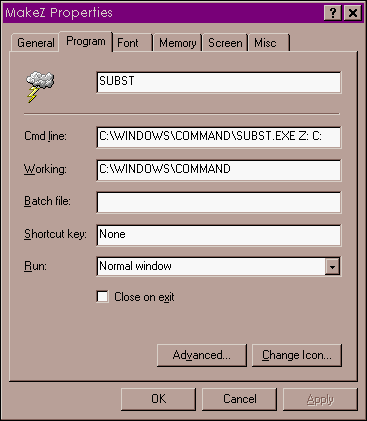
16) Change the path of the "Working:" box to "C:\".
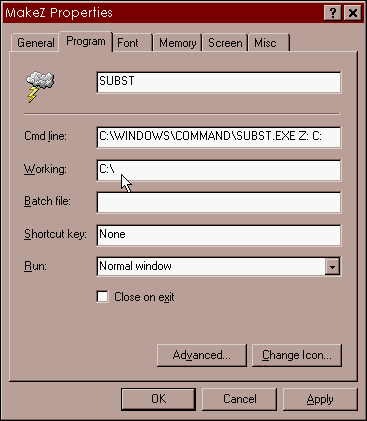
17) Click "OK" and reboot.
18) You should now see drive "Z" as a duplicate of drive "C".
ScreamerNet Shortcut Icon
1) With all applications closed down, right mouse click over an empty area of the Desktop.
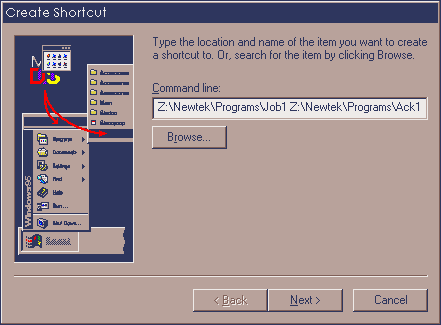
2) Go to "New" then "Shortcut".
3) Enter the following in the Command Line window:
Z:\NEWTEK\PROGRAMS\LWSN.EXE -2 Z:\Newtek\Programs\Job1 Z:\Newtek\Programs\Ack1
For WinNT 3.5x
1) Make a copy of your MSDOS Prompt, then select "Properties" form the file menu.
2) In "Description" name the icon "SNet", In "Command Line" type
Z:\NEWTEK\PROGRAMS\LWSN.EXE -2 Z:\Newtek\Programs\Job1 Z:\Newtek\Programs\Ack1
In "Working Directory" type "Z:\"
NODE COMPUTERS
1) With all applications closed down, right mouse click over an empty area of the Desktop.
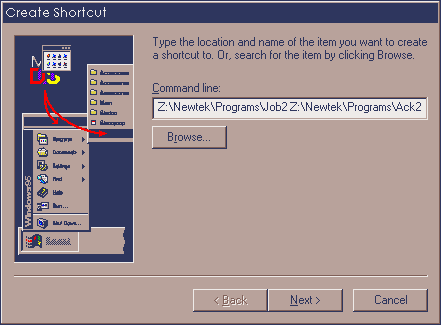
2) Go to "New" then "Shortcut".
3) Enter the following in the Command Line window:
Z:\NEWTEK\PROGRAMS\LWSN.EXE -2 Z:\Newtek\Programs\Job2 Z:\Newtek\Programs\Ack2

4) If you have more computer systems than just these two, repeat the above, but make the next system use Job 3 and Ack3, the next after that Job4 and Ack4, etc. But keep the rest of the command structure the same.
For WinNT 3.5x
1) Make a copy of your MSDOS Prompt, then select "Properties" form the file menu.
2) In "Description" name the icon "SNet", In "Command Line" type
Z:\NEWTEK\PROGRAMS\LWSN.EXE -2 Z:\Newtek\Programs\Job2 Z:\Newtek\Programs\Ack2
In "Working Directory" type "Z:\"
Start ScreamerNet on each computer by double clicking their Shortcut Icon's left out on the main screen. To initialize ScreamerNet open Lightwave from the host Z: drive and choose "Screamer Init" from the SN panel. During initialization the job number assigned to each node computer will correspond to the CPU number in the SN window. Be sure the number of CPU's is greater than or equal to the number of computers you are using. You are now ready to load a scene. (see section "Scene Saving Info" above)
TROUBLESHOOTING
ScreamerNet node not being recognized by a Screamer Init command.
1) Shut down all ScreamerNet CPUs and delete all job and ack files from the Command Directory. Then restart all CPUs and re-perform a Screamer Init.
2) Make sure the number of CPUs is greater or equal to the number of computers you are using, then perform another Screamer Init.
3) Make sure the Command Line arguments for the nodes are correct, as outlined in "Starting ScreamerNet" above.
ScreamerNet CPUs can not find files.
1) Make sure the ContentDirectory (LW.cfg) is set for the shared drive.
2) Make sure you have resaved the scene files after mapping the Host Drive. See "Scene Saving Info" above.
2) Make sure the Host drive is shared. See "Sharing Your Drive".
ScreamerNet nodes render, but no images are saved.
1) Make sure you have resaved the scene file with an image format and path to save the files in the record panel. You must select Save RGB Images and/or Save Alpha Images, then select a path and name then save the scene.
2) The nodes can not see or write to the Host drive. See "Sharing Your Drive and Mapping The Host Drive".
If ScreamerNet crashes during rendering, too many computers are trying to read or write information from the Host computer at the same time.
Plug-ins not being found
1) ScreamerNet pulls its plug-in information from the configuration file found on the host computer (command directory). If the plug-in information found here was not updated to reflect that of the original LW.cfg file, plug-ins will not be found and not rendered.
2) The plug-ins themselves need to be located on the shared drive in order for all of the ScreamerNet CPUs to access the plug-in. The LW.cfg must state the location of the plug-ins, for all ScreamerNet CPUs to access the plug-in.
3) Your scene was set up on a different platform type and the plug-ins are not found on the host computer. You will need the plug-in for your platform that you are using.
If ScreamerNet crashes during rendering, it is possible too many computers are trying to read or write information from the Host computer at the same time.
For additional assistance refer to the manual, FAQ or call Technical Support at 913-228-8282
Copyright © 1997 NewTek Incorporated. All Rights Reserved.


 http://www.newtek.com/tech/faqs/lightwav/screamer.html (Amiga Plus Extra No. 5/97, 05/1997)